User Settings
Selecting the "User Management" (or "Roles" in some installations) sidebar item will bring up a list of users:
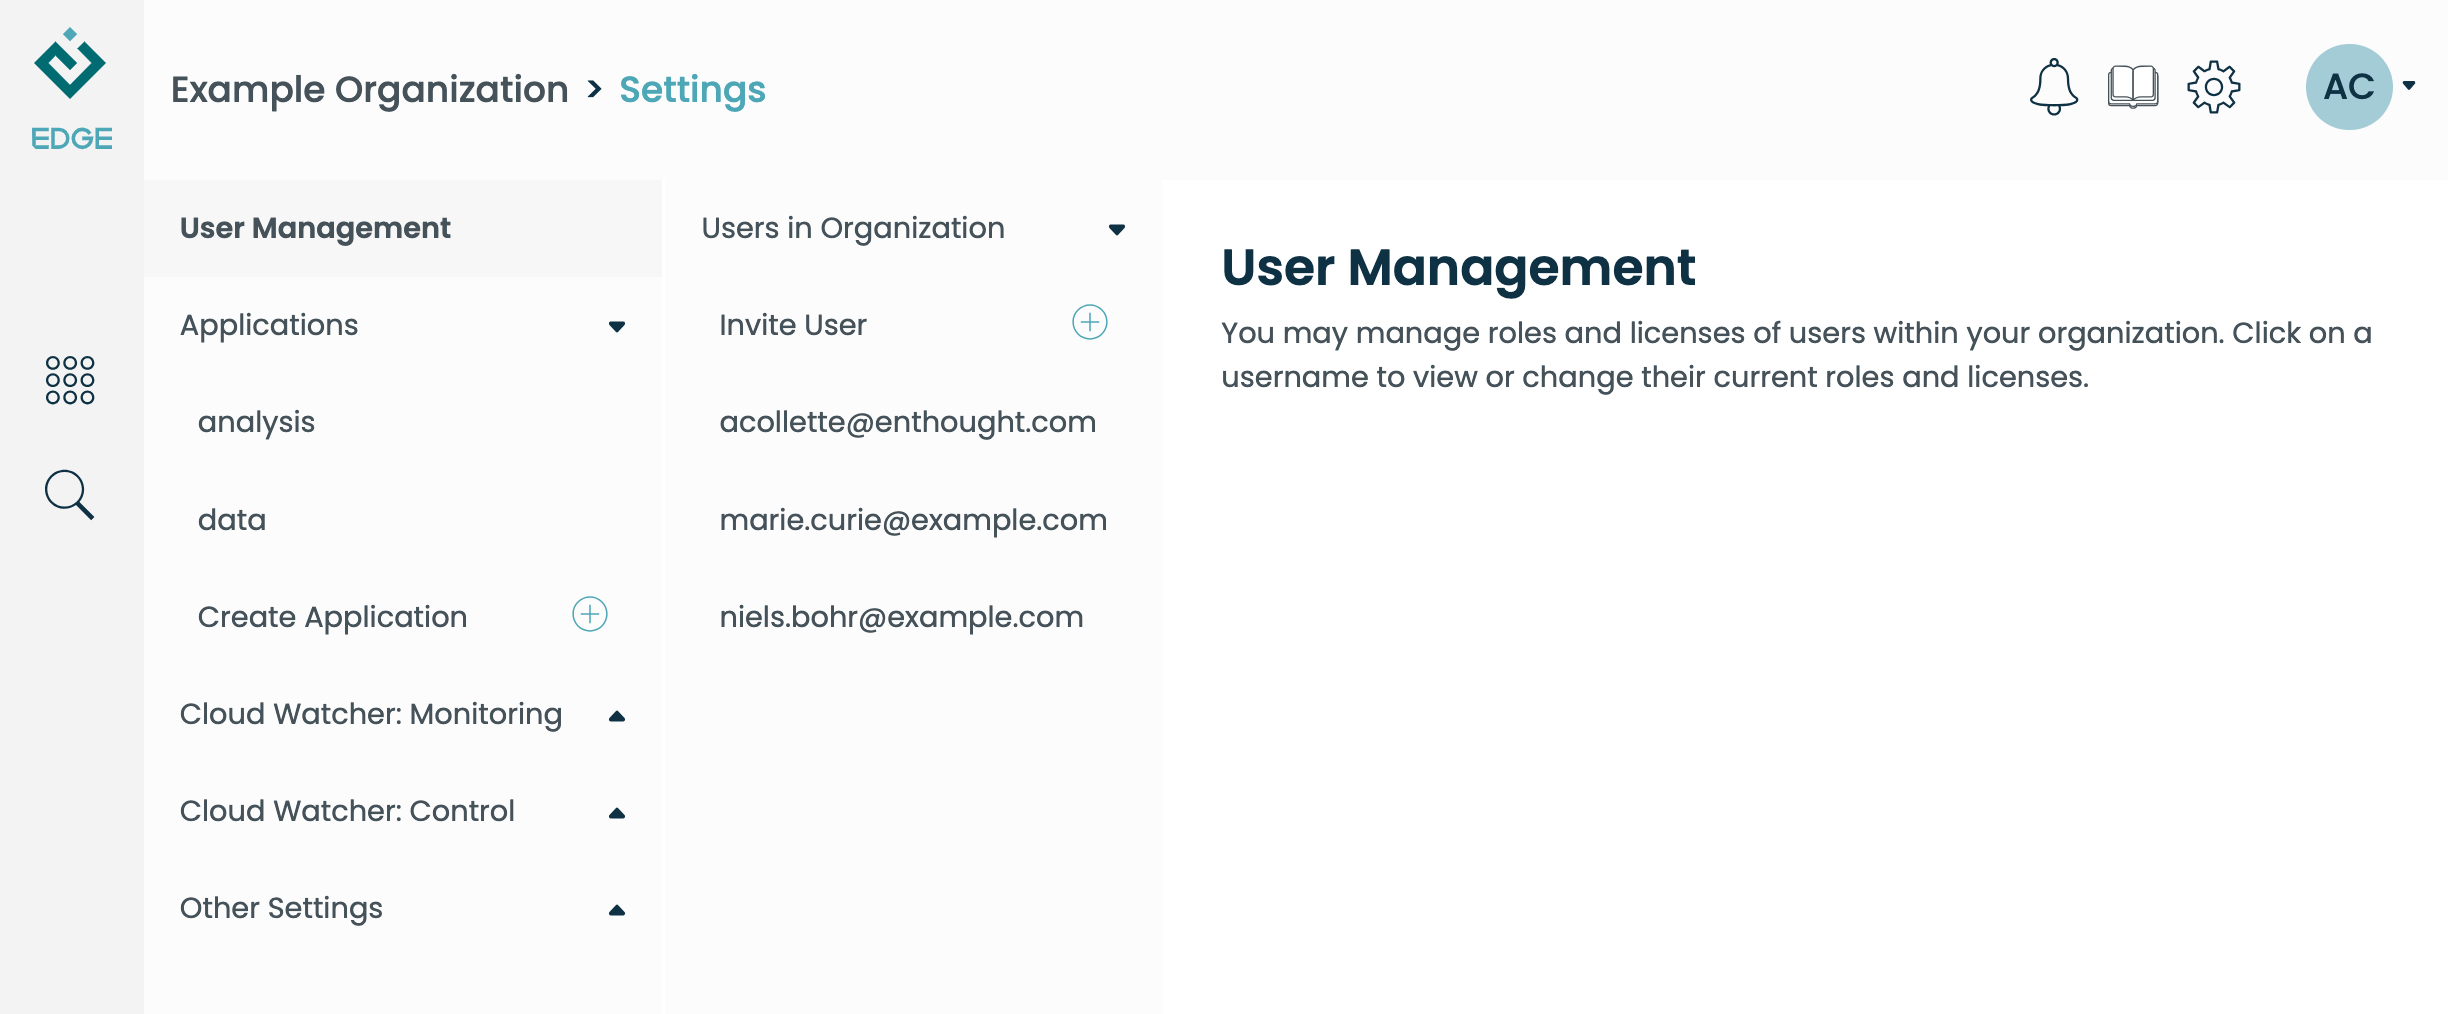
Select a particular user name to view their settings:
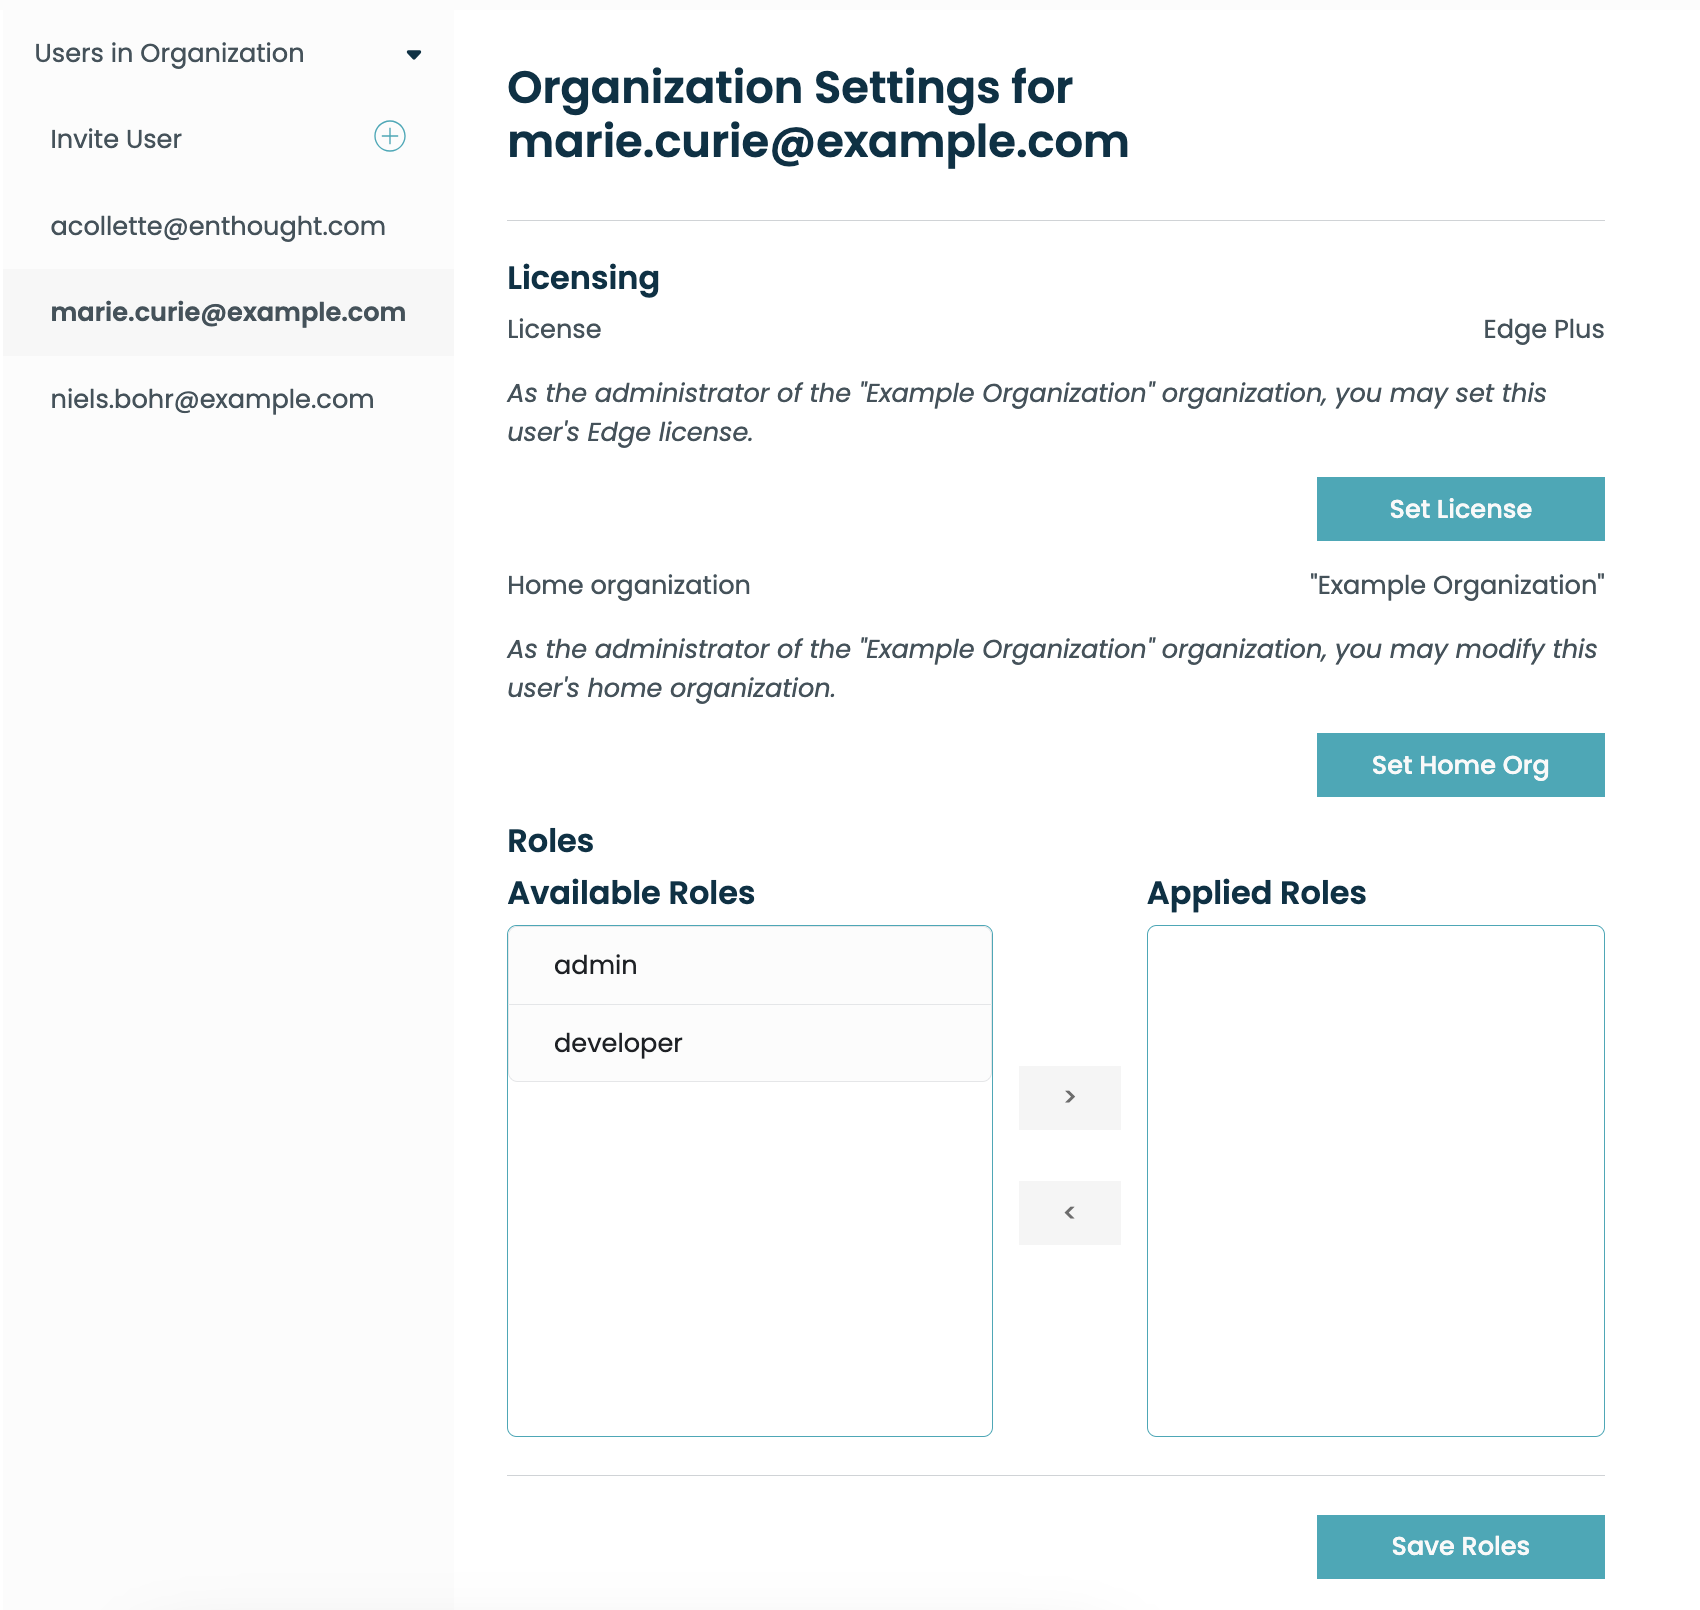
Changing a user's access roles
Each organization has two roles which can optionally be assigned to a user. These are:
Admin
Make this user an organization admin. Use sparingly, as they can
then perform any task you can perform.
Developer
Gives the user the right to create new applications and application versions
to this organization. Developers can also view both published and unpublished
versions of applications. Keep in mind that a user must have both the
Developer role and an Edge Developer license, to perform these tasks.
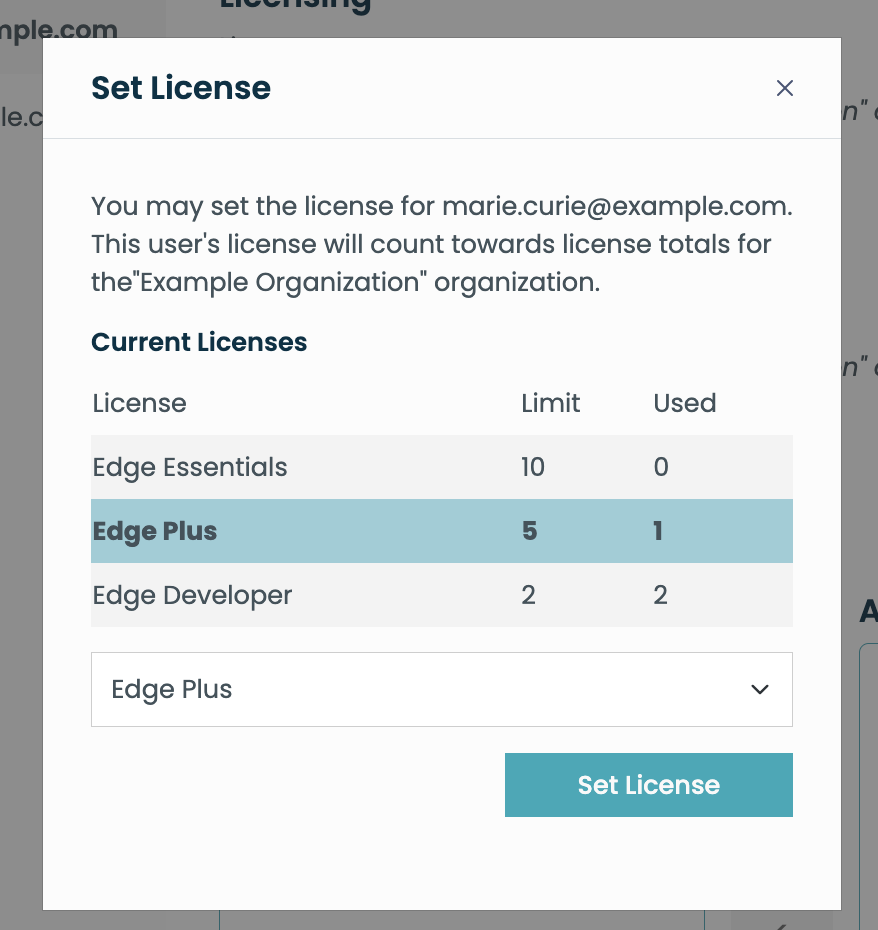
Changing a user's license
If you are the admin for this user's "home" org, you can manage their license tier. Click "Set License" to bring up the dialog for picking a license. For convenience, this dialog will also display the license quota for your org, and the number of licenses used so far:
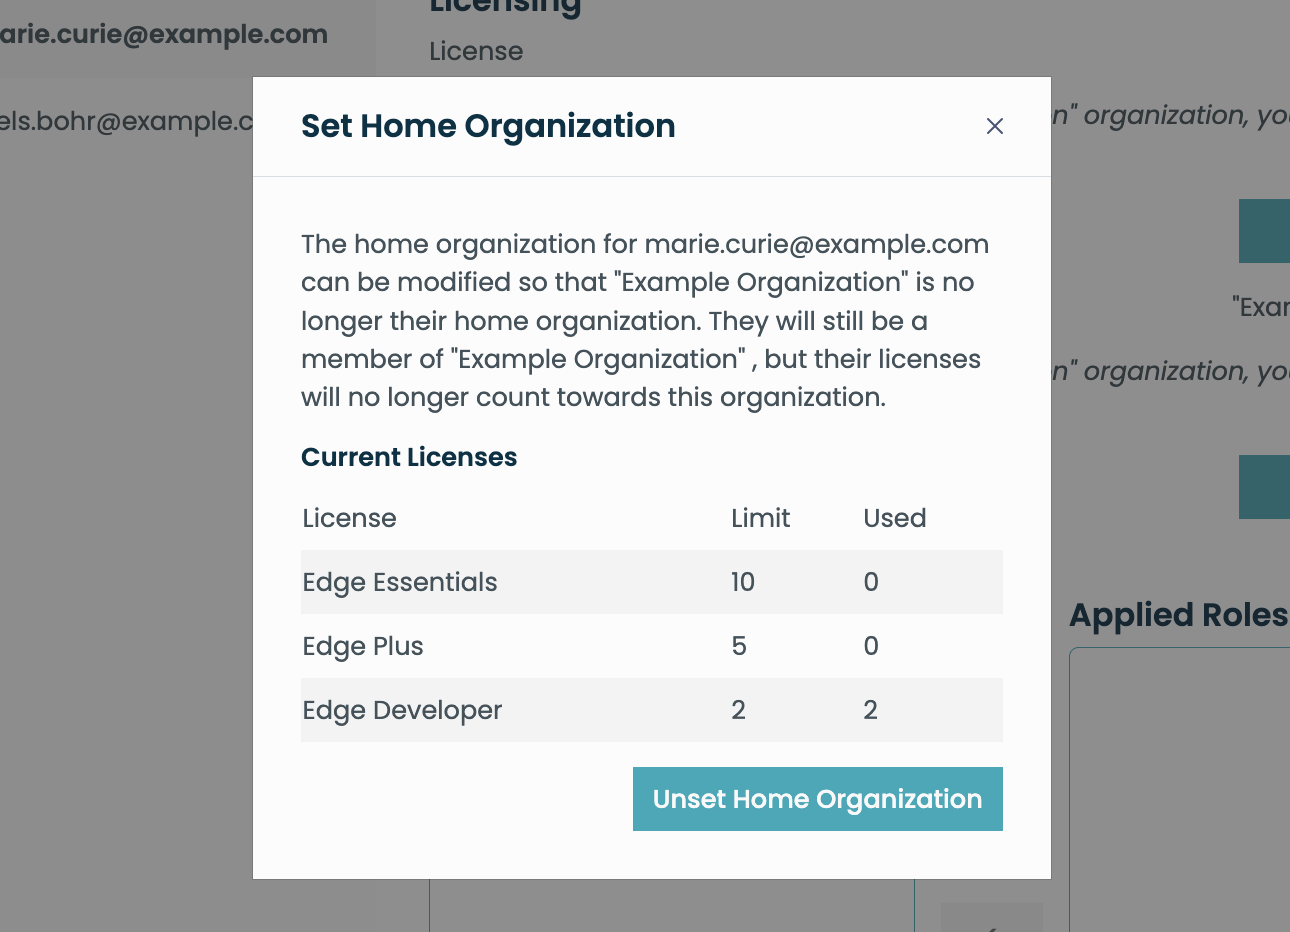
Changing a user's home organization
Moving users between organizations can be accomplished in two ways: (1) a server admin who oversees both organizations can simply move users between them, or (2) two org admins can coordinate to release and receive users between their orgs:
- Org A sets the user license to No License
- Org A unsets the user home
- Org B sets the user home (to Org B)
- Org B assigns a new license
Use the "Set Home Org" button to accomplish steps 2 and 3 above.
Pre‑starting Analysis Apps for Training Classes
Improve the student experience by pre-starting the Analysis app for all participants before a training session. This avoids cold-start delays, making the first launch effectively instantaneous.
This provides an alternative to using placeholders. The benefit is that the applications automatically shut down after the defined idle period, ensuring they are not left running unnecessarily and are ready to be restarted just before the training session.
Prerequisites
Admin access to the target Edge organization.
The notebook
Spawn_Analysis.ipynbavailable in your organization’s Files on Edge.Valid Edge user accounts within the organization.
Instructions
1) Open the notebook: Navigate to Files in Edge and launch Spawn_Analysis.ipynb.
2) Configure participants and organization: In the first cell of the notebook, edit the users list with the participant Edge user accounts and, if needed, set the organization name.
# Example: update with valid edge user accounts
users = [
"participant1@example.com",
"participant2@example.com",
# ... one edge user account per line ...
]

# If your organization isn’t “default”, change this to your organization’s name
organization = "default"

APP_NAME = "analysis"
APP_VERSION = "1.0.0"
# Instance size can be adjusted based on resource needs, e.g. "edge.small", "edge.medium", "edge.large", etc.
INSTANCE_SIZE = "edge.medium"

for user in users:
    edge.admin.spawn_native_app(user, organization, APP_NAME, APP_VERSION, INSTANCE_SIZE)
3) Run the cell: Run the first cell of the notebook. The script will iterate through the list of users and request the Analysis app for each account. You can re-run this cell if you need to add more participants later.
4) Verify app launches: Go to Cloud Monitoring → System Activity and confirm that the Analysis app launches are listed for the expected user accounts.