Managing Users
Selecting "Users" from the sidebar will bring up the users list:

Adding a user
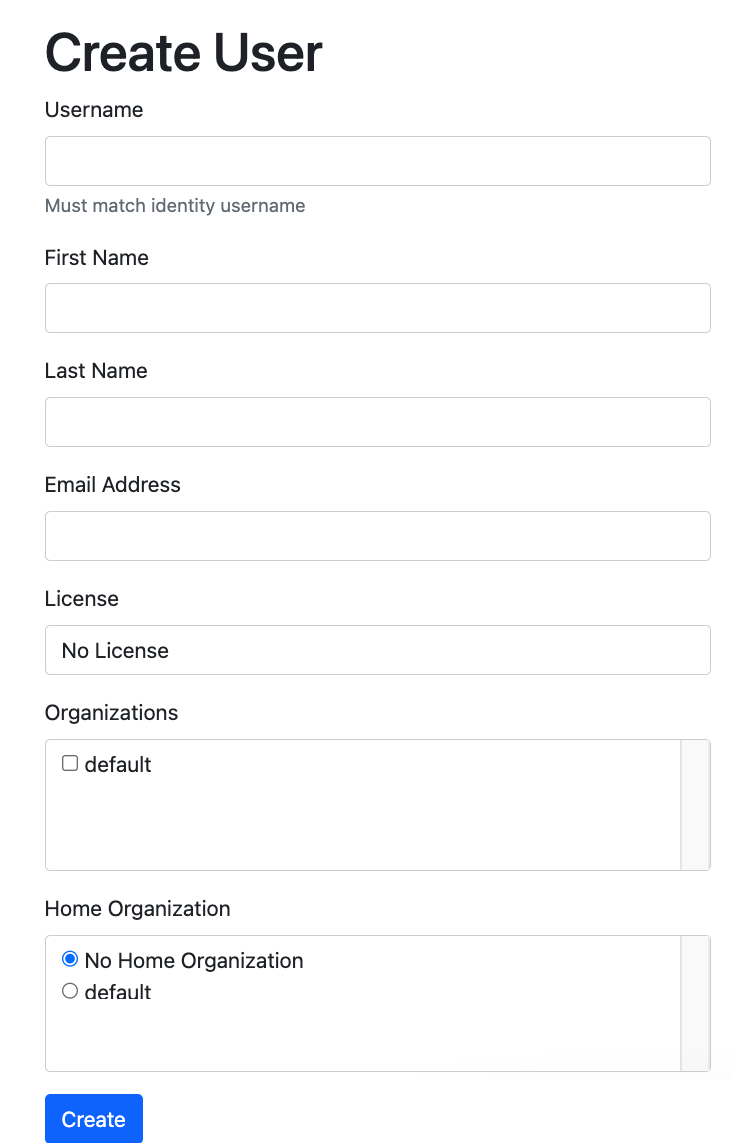
Selecting "Create User" will bring up the following form. To proceed, you will need to configure some settings for the new user. We'll go through that step by step below.

Step 1: Enter basic details
The "username" field must match the user identifier in the identity system to which Edge is connected. In other words, if your SSO solution asks for an email address and password to log in, this would be the user's email address.
First name and last name are optional but recommended. These are used for the initials on the user menu on the Scientific Workbench. Email address is also optional but recommended.
Step 2: Select a license
Select an appropriate license, based on the information in the License Tiers documentation and the user's expected needs.
It is possible to create a user without a license, but that user will not have access to do very much with Edge. Even launching the Data App requires at least the Edge Essentials tier of license.
Step 3: Configure organization membership
You can choose whether to add the user to one or more Edge organizations. As with licenses, it is possible to create a user without access to any organizations, but they will not be able to use Edge.
You can optionally assign a "Home" organization for the user. Their license will count against any quota assigned to this organization.
Step 4: Create the user and assign roles
Click "Create" to create the user, and return to the service dashboard.
After a user is created, see the User Settings documentation for assigning the user roles at the level of an organization.
Server admin role
To make the user a server admin, click "Edit" on the user's profile and select "server-admin" from the "Update Server Roles" listbox.
Server admins have full access to all organizations and data in Edge, and in general can take any action. This role is intended for I.T. professionals with responsibility for managing an Edge installation.