JupyterLab on Edge
Jupyter notebooks are the most popular environment for exploratory analysis and interactive programming. Edge makes them even more powerful for you. To get started, click on the "Analysis" tile on your Scientific Workbench. Once you are inside the Analysis App, you can work with your Jupyter notebooks just like any other Jupyter or JupyterLab system.
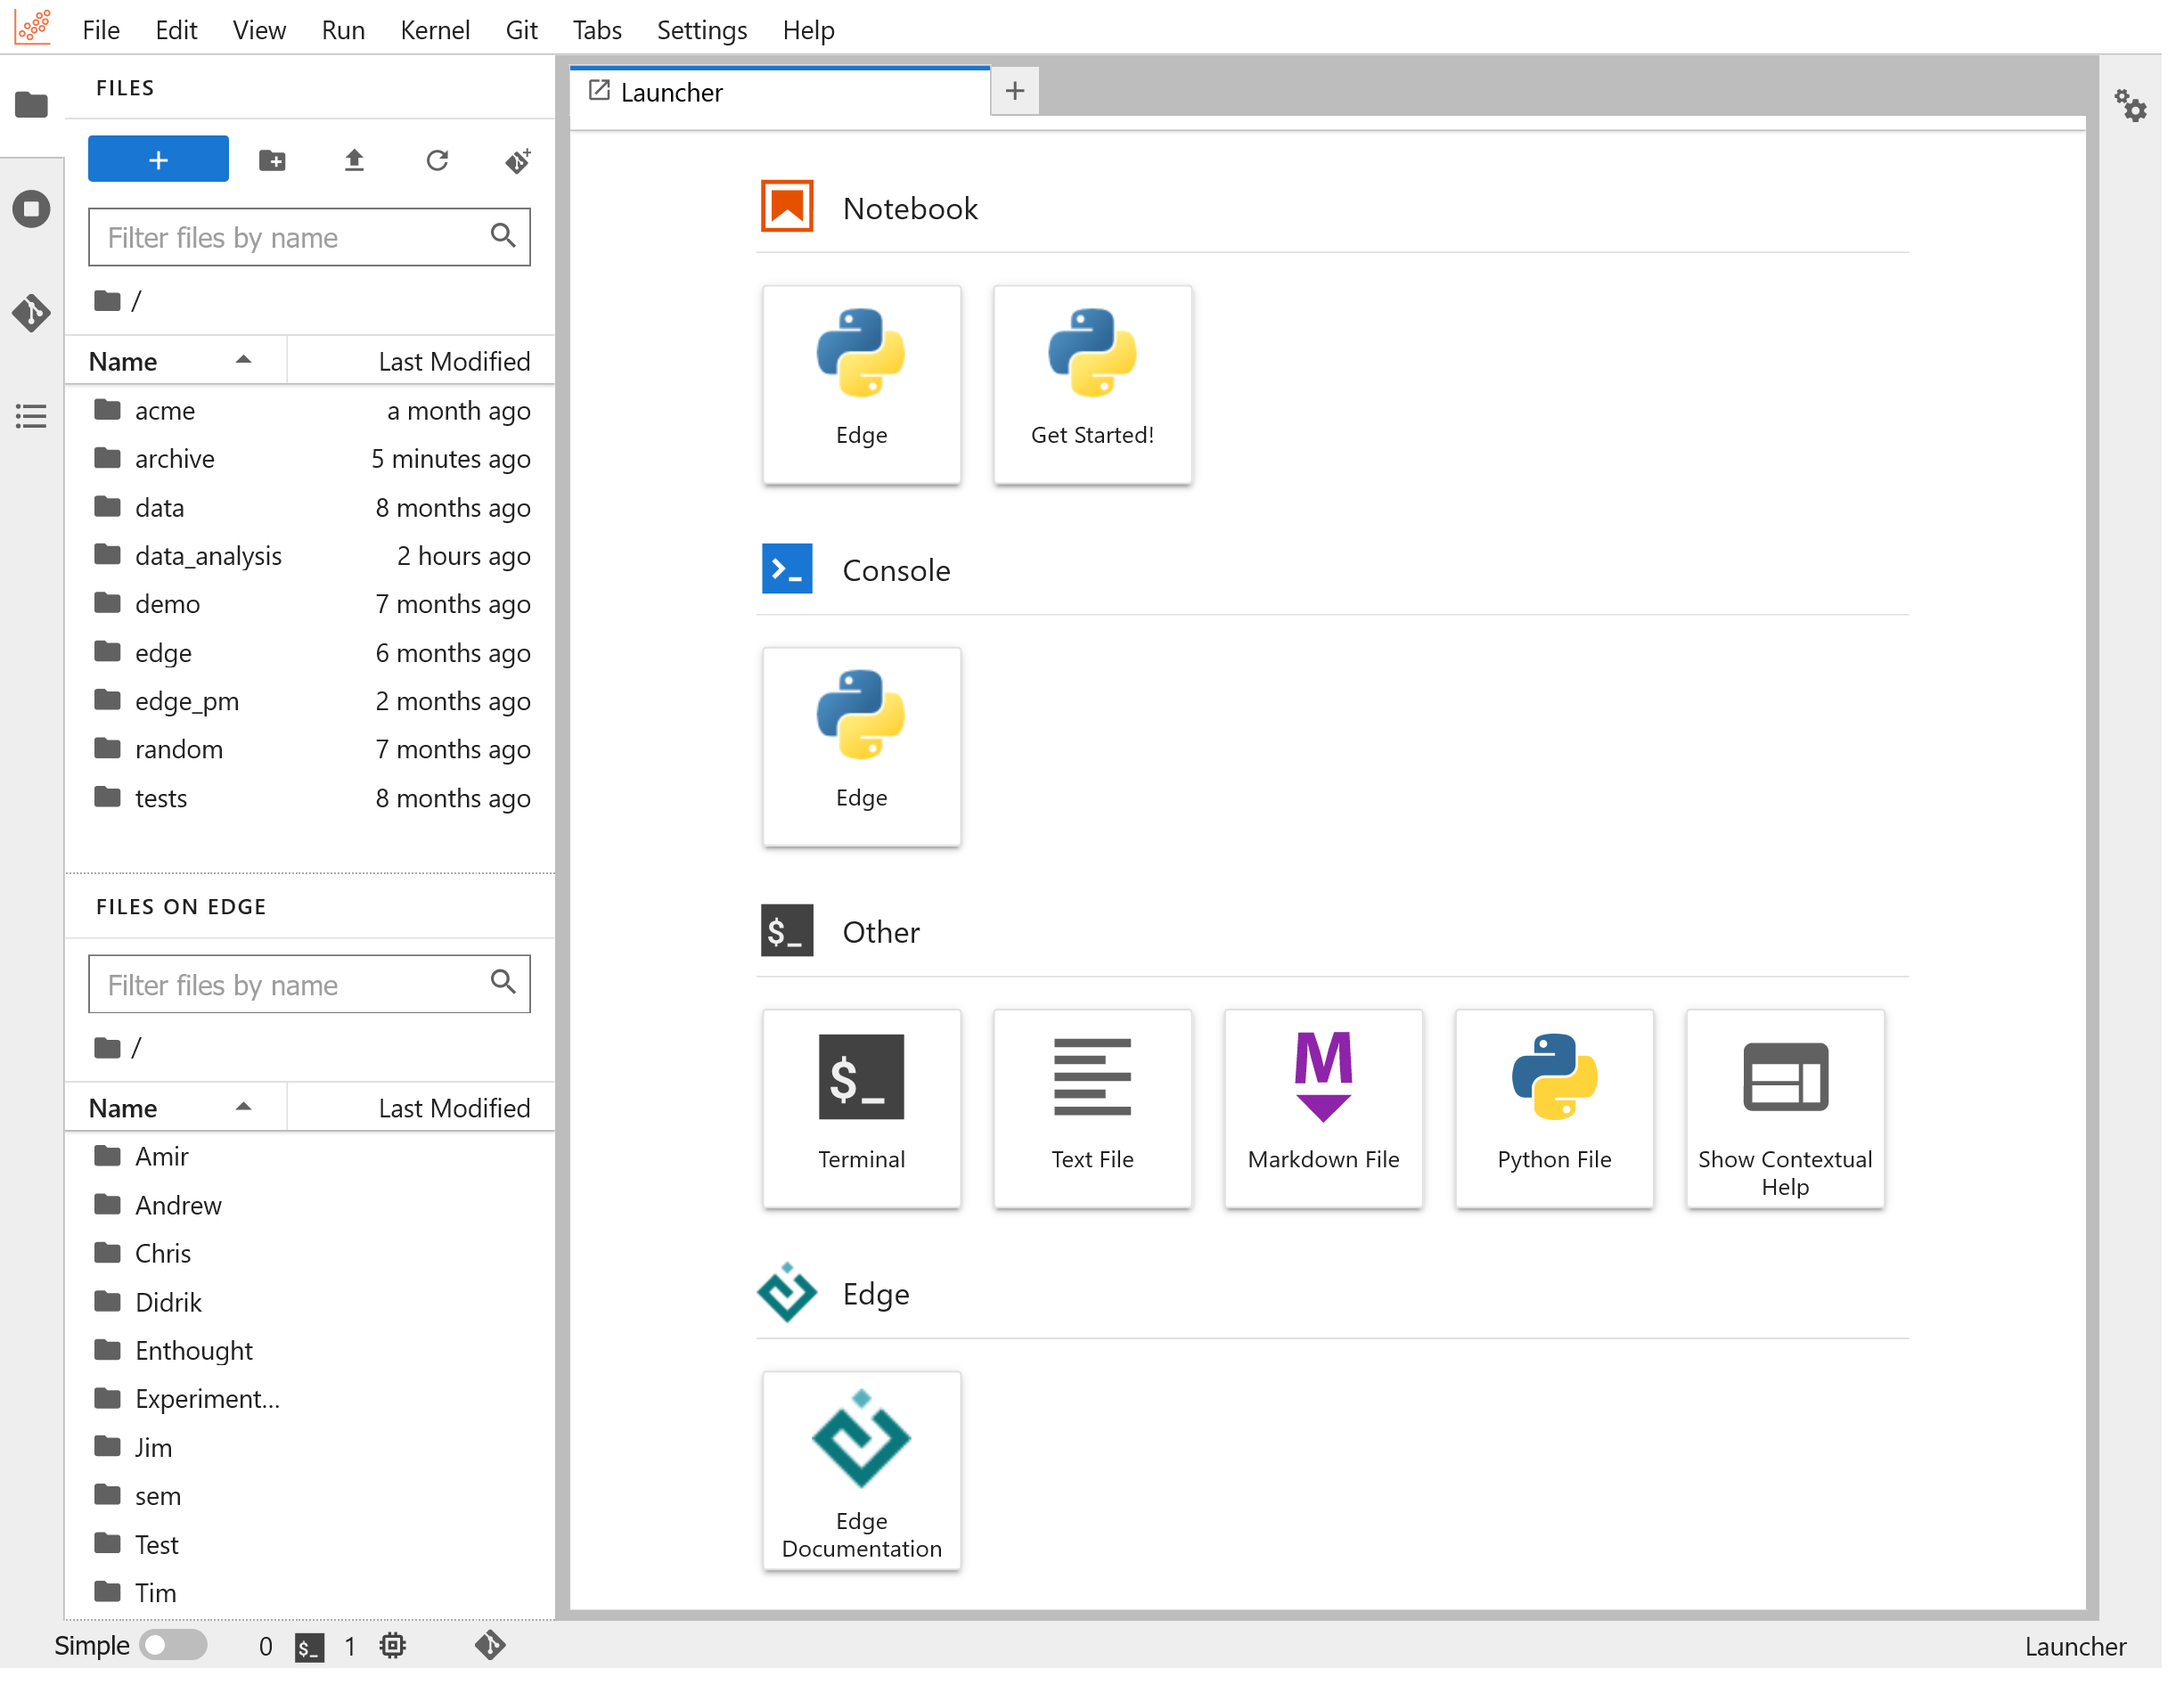
You can launch a "Get Started!" notebook and see a quick demonstration of what you can do in notebooks on Edge:
Connection to Files on Edge
On the left sidebar of your Analysis App, you will notice that there are two file browsers. One is the built-in local JupyterLab filesystem where you can upload and read data for analysis. This is also where you create and save your notebooks. But there is also a second browser specific to JupyterLab on Edge that points to Files on Edge. This is the shared file space of the Edge organization where you have launched your Analysis App from.
You can move data between your local JupyterLab filesystem and Files on Edge with a simple drag and drop. This works in both directions. If you want to create a local copy of a shared file to analyze and modify it in a notebook; or if you want to share the results of your work in JupyterLab with your team, all you have to do is to drag and drop files between the two file browsers:
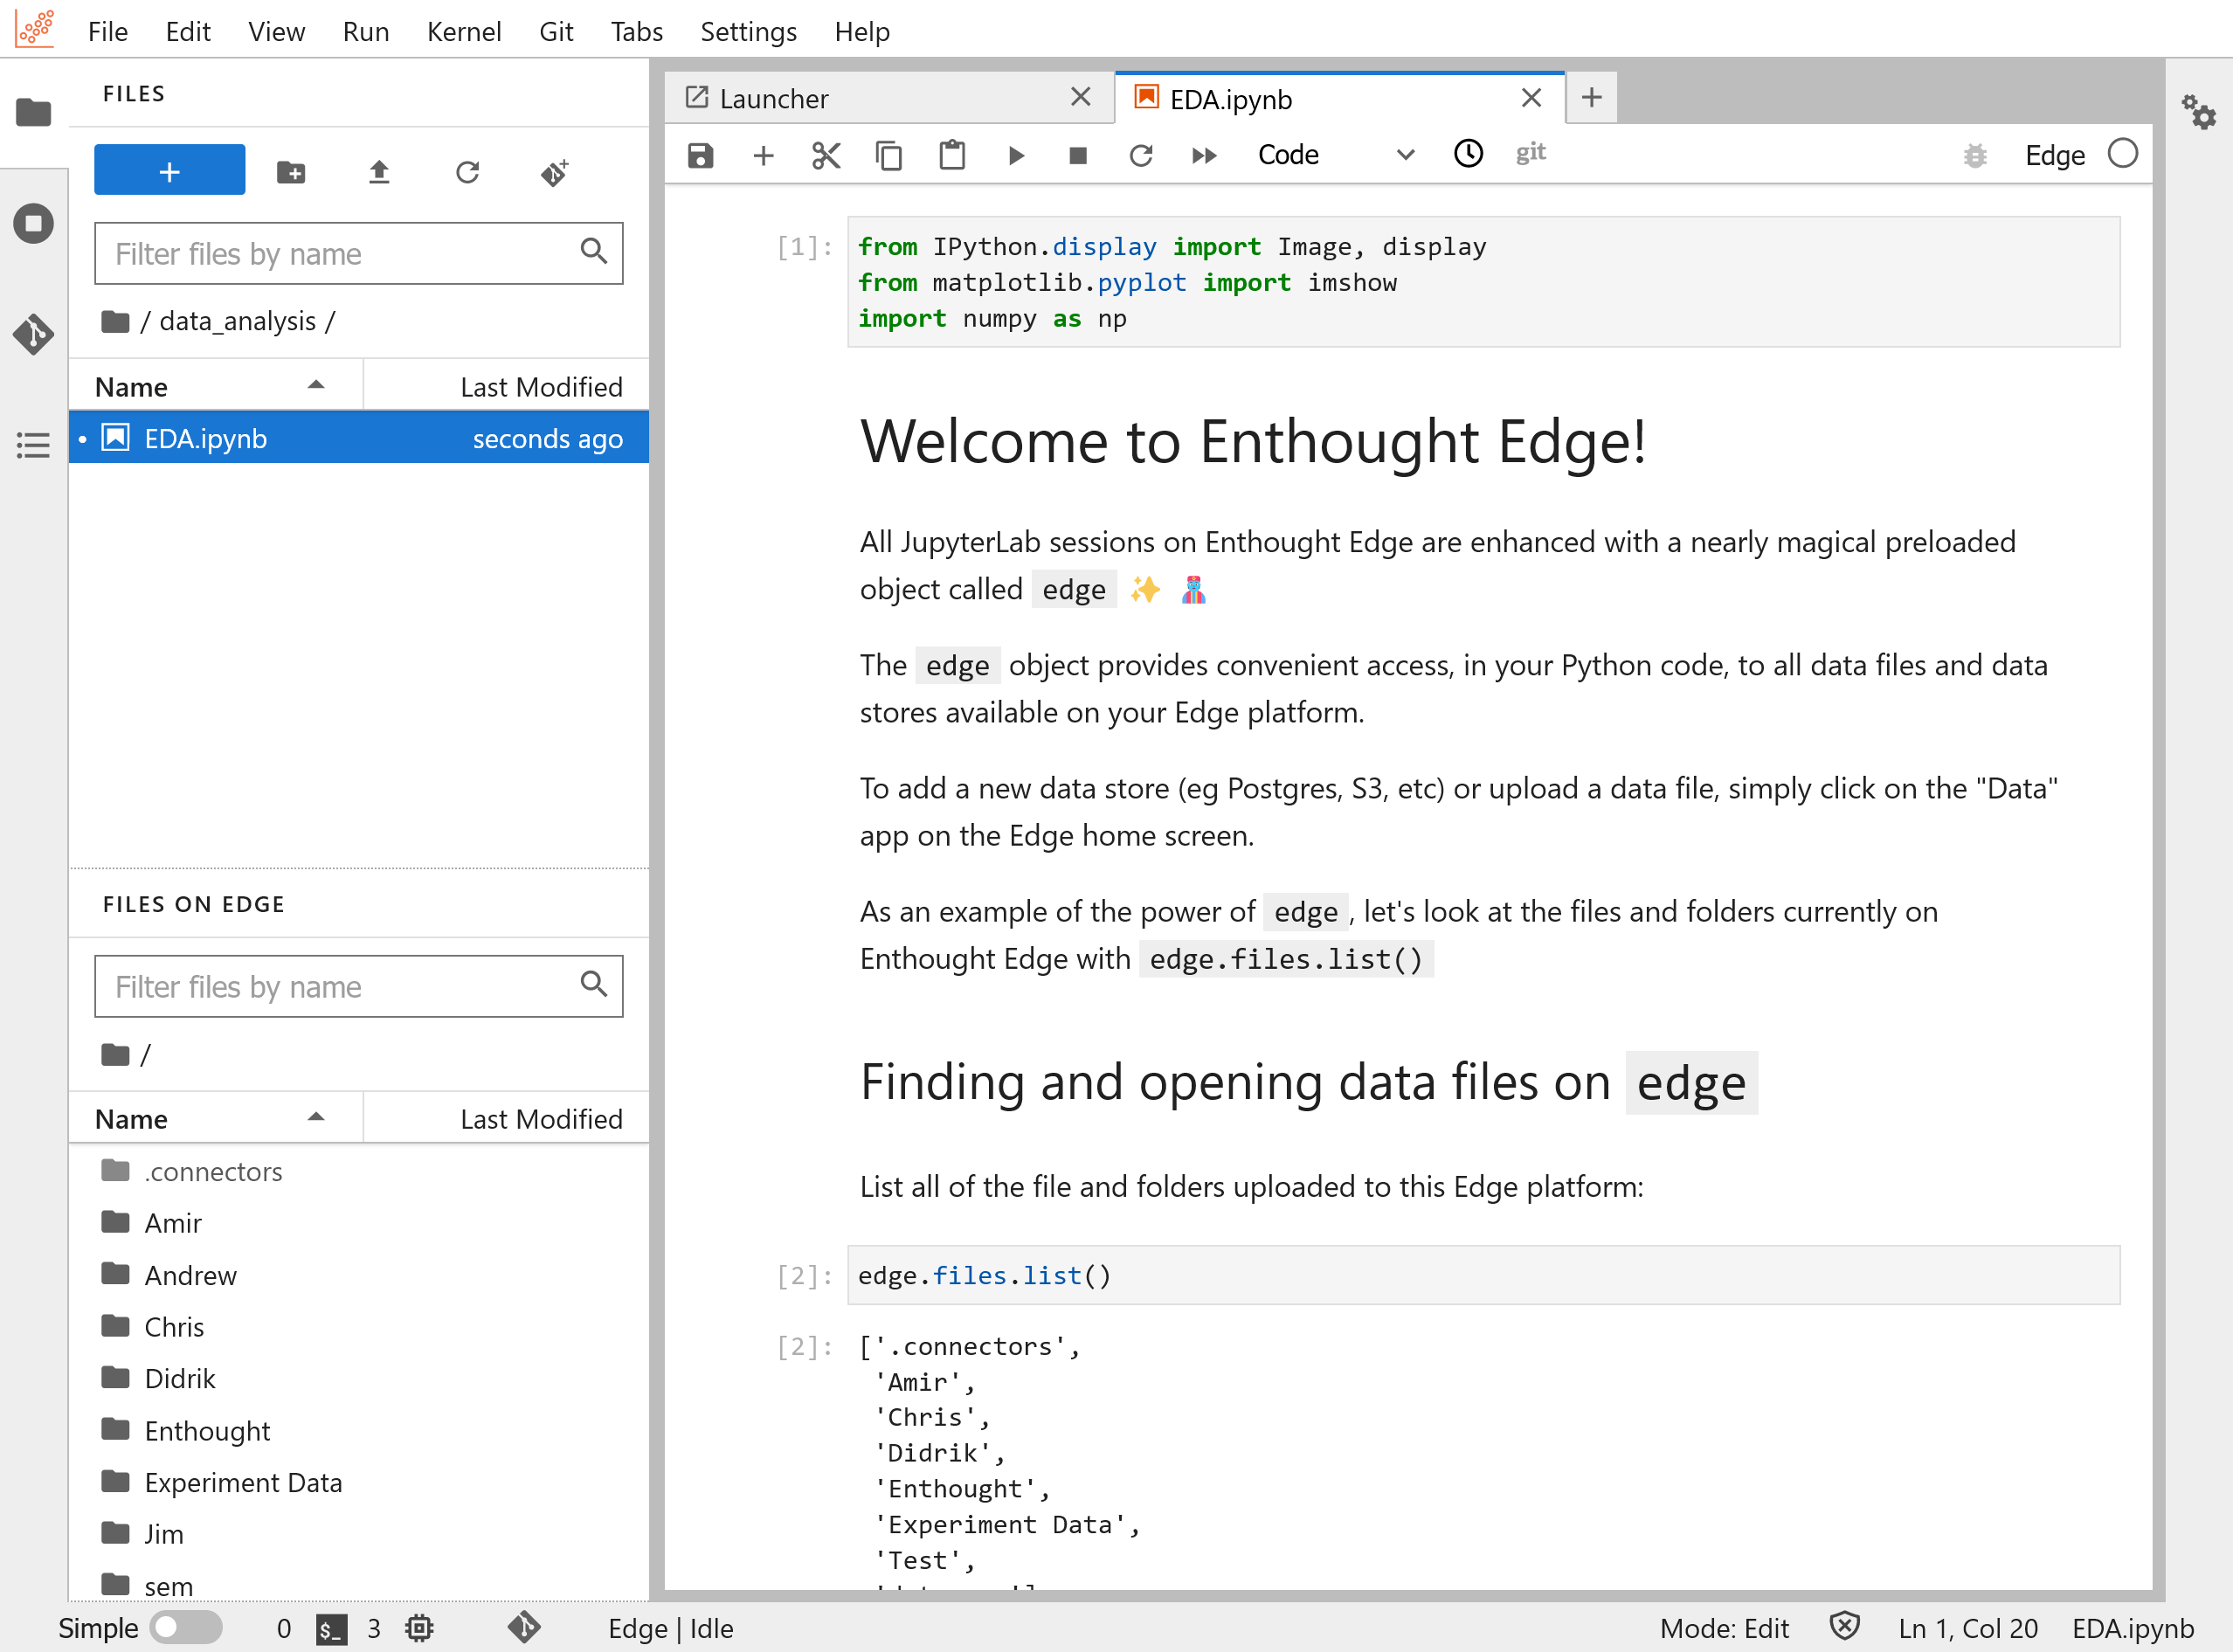
Jupyter notebooks on Edge
On Edge, you also get a predefined object in each notebook, called edge.
This object serves as your programmatic access point to the rest of your Edge
organization. At any time, you can evaluate edge (run a cell with the edge
object by itself) to get an overview of the Edge object and its functionality:
>>> edge
This object serves as your entry point to access data and files in Edge.

    You can browse files stored in the Edge internal file
    system by using the ".files" attribute.  Here's an example:

    [1]: edge.files.list()
    ['myfile.jpg', 'myfile.csv', 'myfolder']

    ...
>>> type(edge)
edge.edge_session.EdgeSession
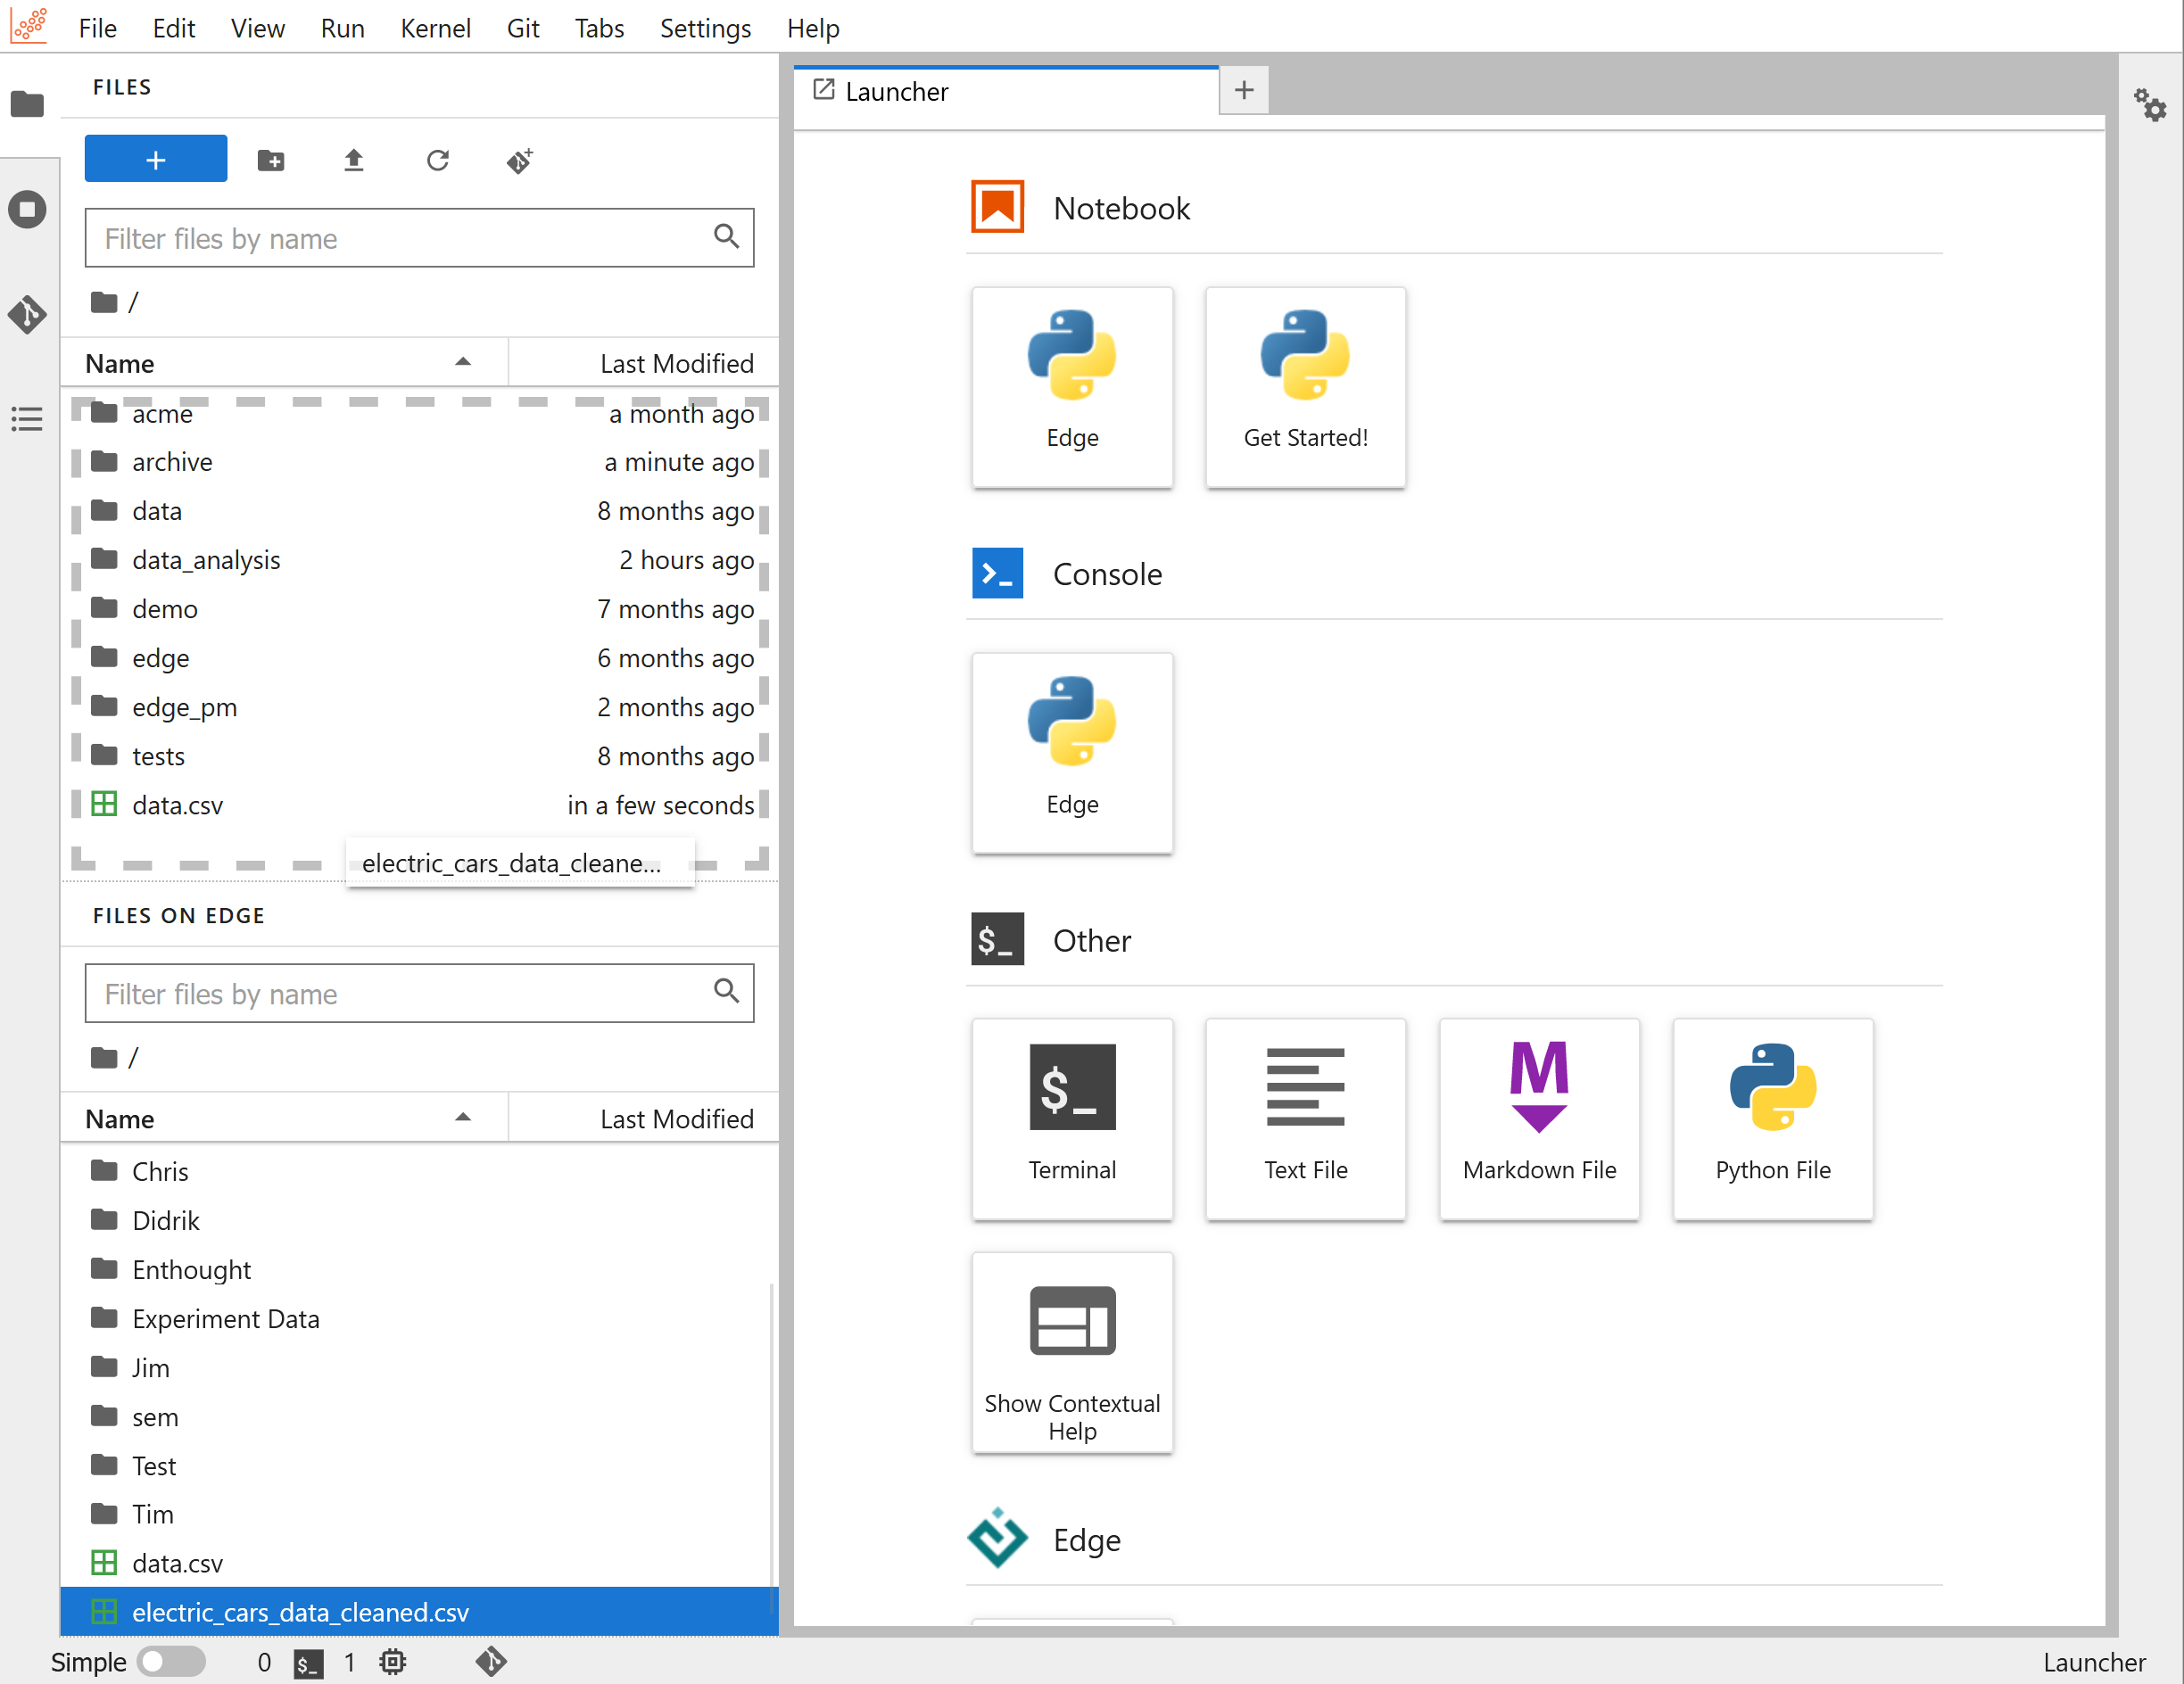
The edge object connects you to the rest of the Edge ecosystem. For example,
here's how you can list uploaded files and folders in Edge's internal storage:
>>> edge.files.list()
['Example Folder',
 'Experiments.txt',
 'Imported Data',
 'My Data',
 'Projects',
 'data.csv',
 'data_cleaned.csv',
 'image001.png',
 'image002.png',
 'image003.png']
From your edge object, you can also access data from remote data sources:
>>> edge.sources.list()
['data-warehouse-sql', 'petstore-api', 'data-lake-s3']

>>> lake = edge.sources.get('data-lake-s3')
>>> lake.root.list()
['Experiment data', 'SEM micrographs']

>>> lake.root.open('Experiment data').list()
['01f23764ad0b4642a374f68349c5504c.png',
 '0a311d9ac6cc4fdb9aace7d927bae892.bin',
 '232d50ebf0714315953aa2b0edd0c9f6.bin',
 '367581c15fc24175af8fbd78cd13f0fd.png',
 '5c622f05c7ec44e1b3749961c2ae56e4.png',
 '770a34f466ad4c76bbde849337be48b6.bin',
 '92a62cccfcb849b885c29de64114c3ae.bin',
 '92da96436830471195a12f56bb4af6c8.png',
 'd8d73e96bff44632985ad563eb4397cd.bin',
 'dc852dfb0b89442ab918297db9b8d727.png',
 'e004927530c74ed7ac8c510744645d55.png',
 'e38326ab94494f50ba1050b3ee704eee.bin']
Installing Python packages
A large number of Python packages useful for scientific data analysis
are preinstalled. You can also add additional packages using edm
(the Enthought Deployment Manager) or pip (the default Python
package manager) in a JupyterLab terminal:
$ edm install <package-name>
$ pip install <package-name>
Packages can't be installed into a running Python environment. Before
installing packages via edm or pip, be sure to shut down any active
kernels. To do this, go to the Kernels menu and select Shut Down All
Kernels. Please note that you will lose any in-memory values for your
notebooks.
We recommend using the Enthought Deployment Manager (edm) unless the
package you want isn't available from Enthought's package repositories.
Packages in edm have been extensively tested to make sure they work
together. You can read more about EDM in the
official EDM docs.
Adding Custom Jupyter Kernels
You can add custom Jupyter kernels to your Analysis App using either EDM or UV. This is useful when you need to work with specific Python environments or versions.
Using EDM
To add a new kernel using EDM:
- First, create a new environment with your desired packages in a JupyterLab terminal:
$ edm env create my-custom-env
$ edm install -e my-custom-env ipykernel
- Register the kernel with Jupyter:
$ edm run -e my-custom-env -- python -m ipykernel install --user --name=my-custom-env --display-name="My Custom Environment"
Using UV
Before using UV, you need to install it first. You can install UV from the terminal:
$ curl -LsSf https://astral.sh/uv/install.sh | sh
For more information about UV installation and configuration, visit the UV documentation.
To add a new kernel using UV:
- Create a new virtual environment and install required packages in a JupyterLab terminal:
$ uv venv my-custom-env
$ source my-custom-env/bin/activate
$ uv pip install ipykernel
- Register the kernel with Jupyter:
$ python -m ipykernel install --user --name=my-custom-env --display-name="My Custom Environment"
After adding a new kernel, you can select it from the kernel menu in your notebook. The kernel will be available for all new notebooks you create.
Remember to shut down any running kernels before installing new packages or creating new environments. You can do this from the Kernel menu by selecting "Shut Down All Kernels".
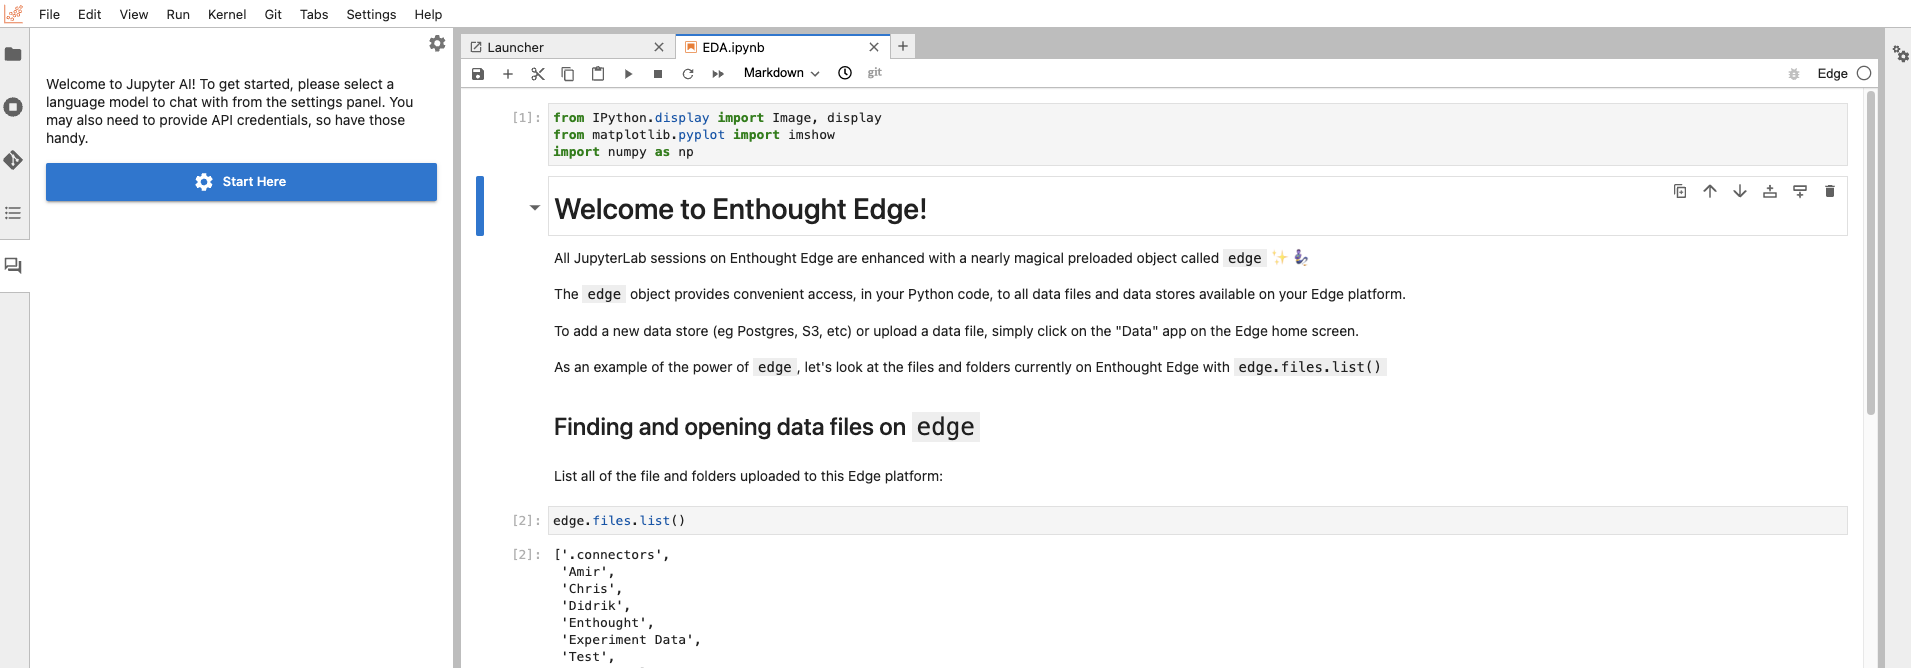
From a notebook tab, you can return to the launcher page using the large blue "+" button at top left (screenshot attached below). From there you can launch new notebooks, terminal windows and more.

Connecting to Github
If you have a repository hosted on a version control service such as GitHub or GitLab, you can clone it into your workspace by using the built-in git extension.
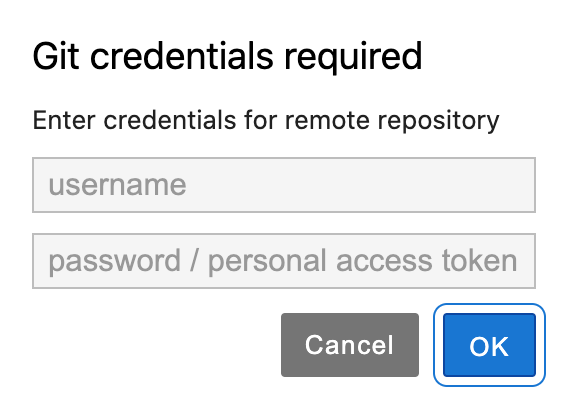
Clicking on "Git" in the top menu brings up the option to "Clone a Repository", which will then prompt you to enter the GitHub or GitLab repository URI. Be sure it starts with "https://".
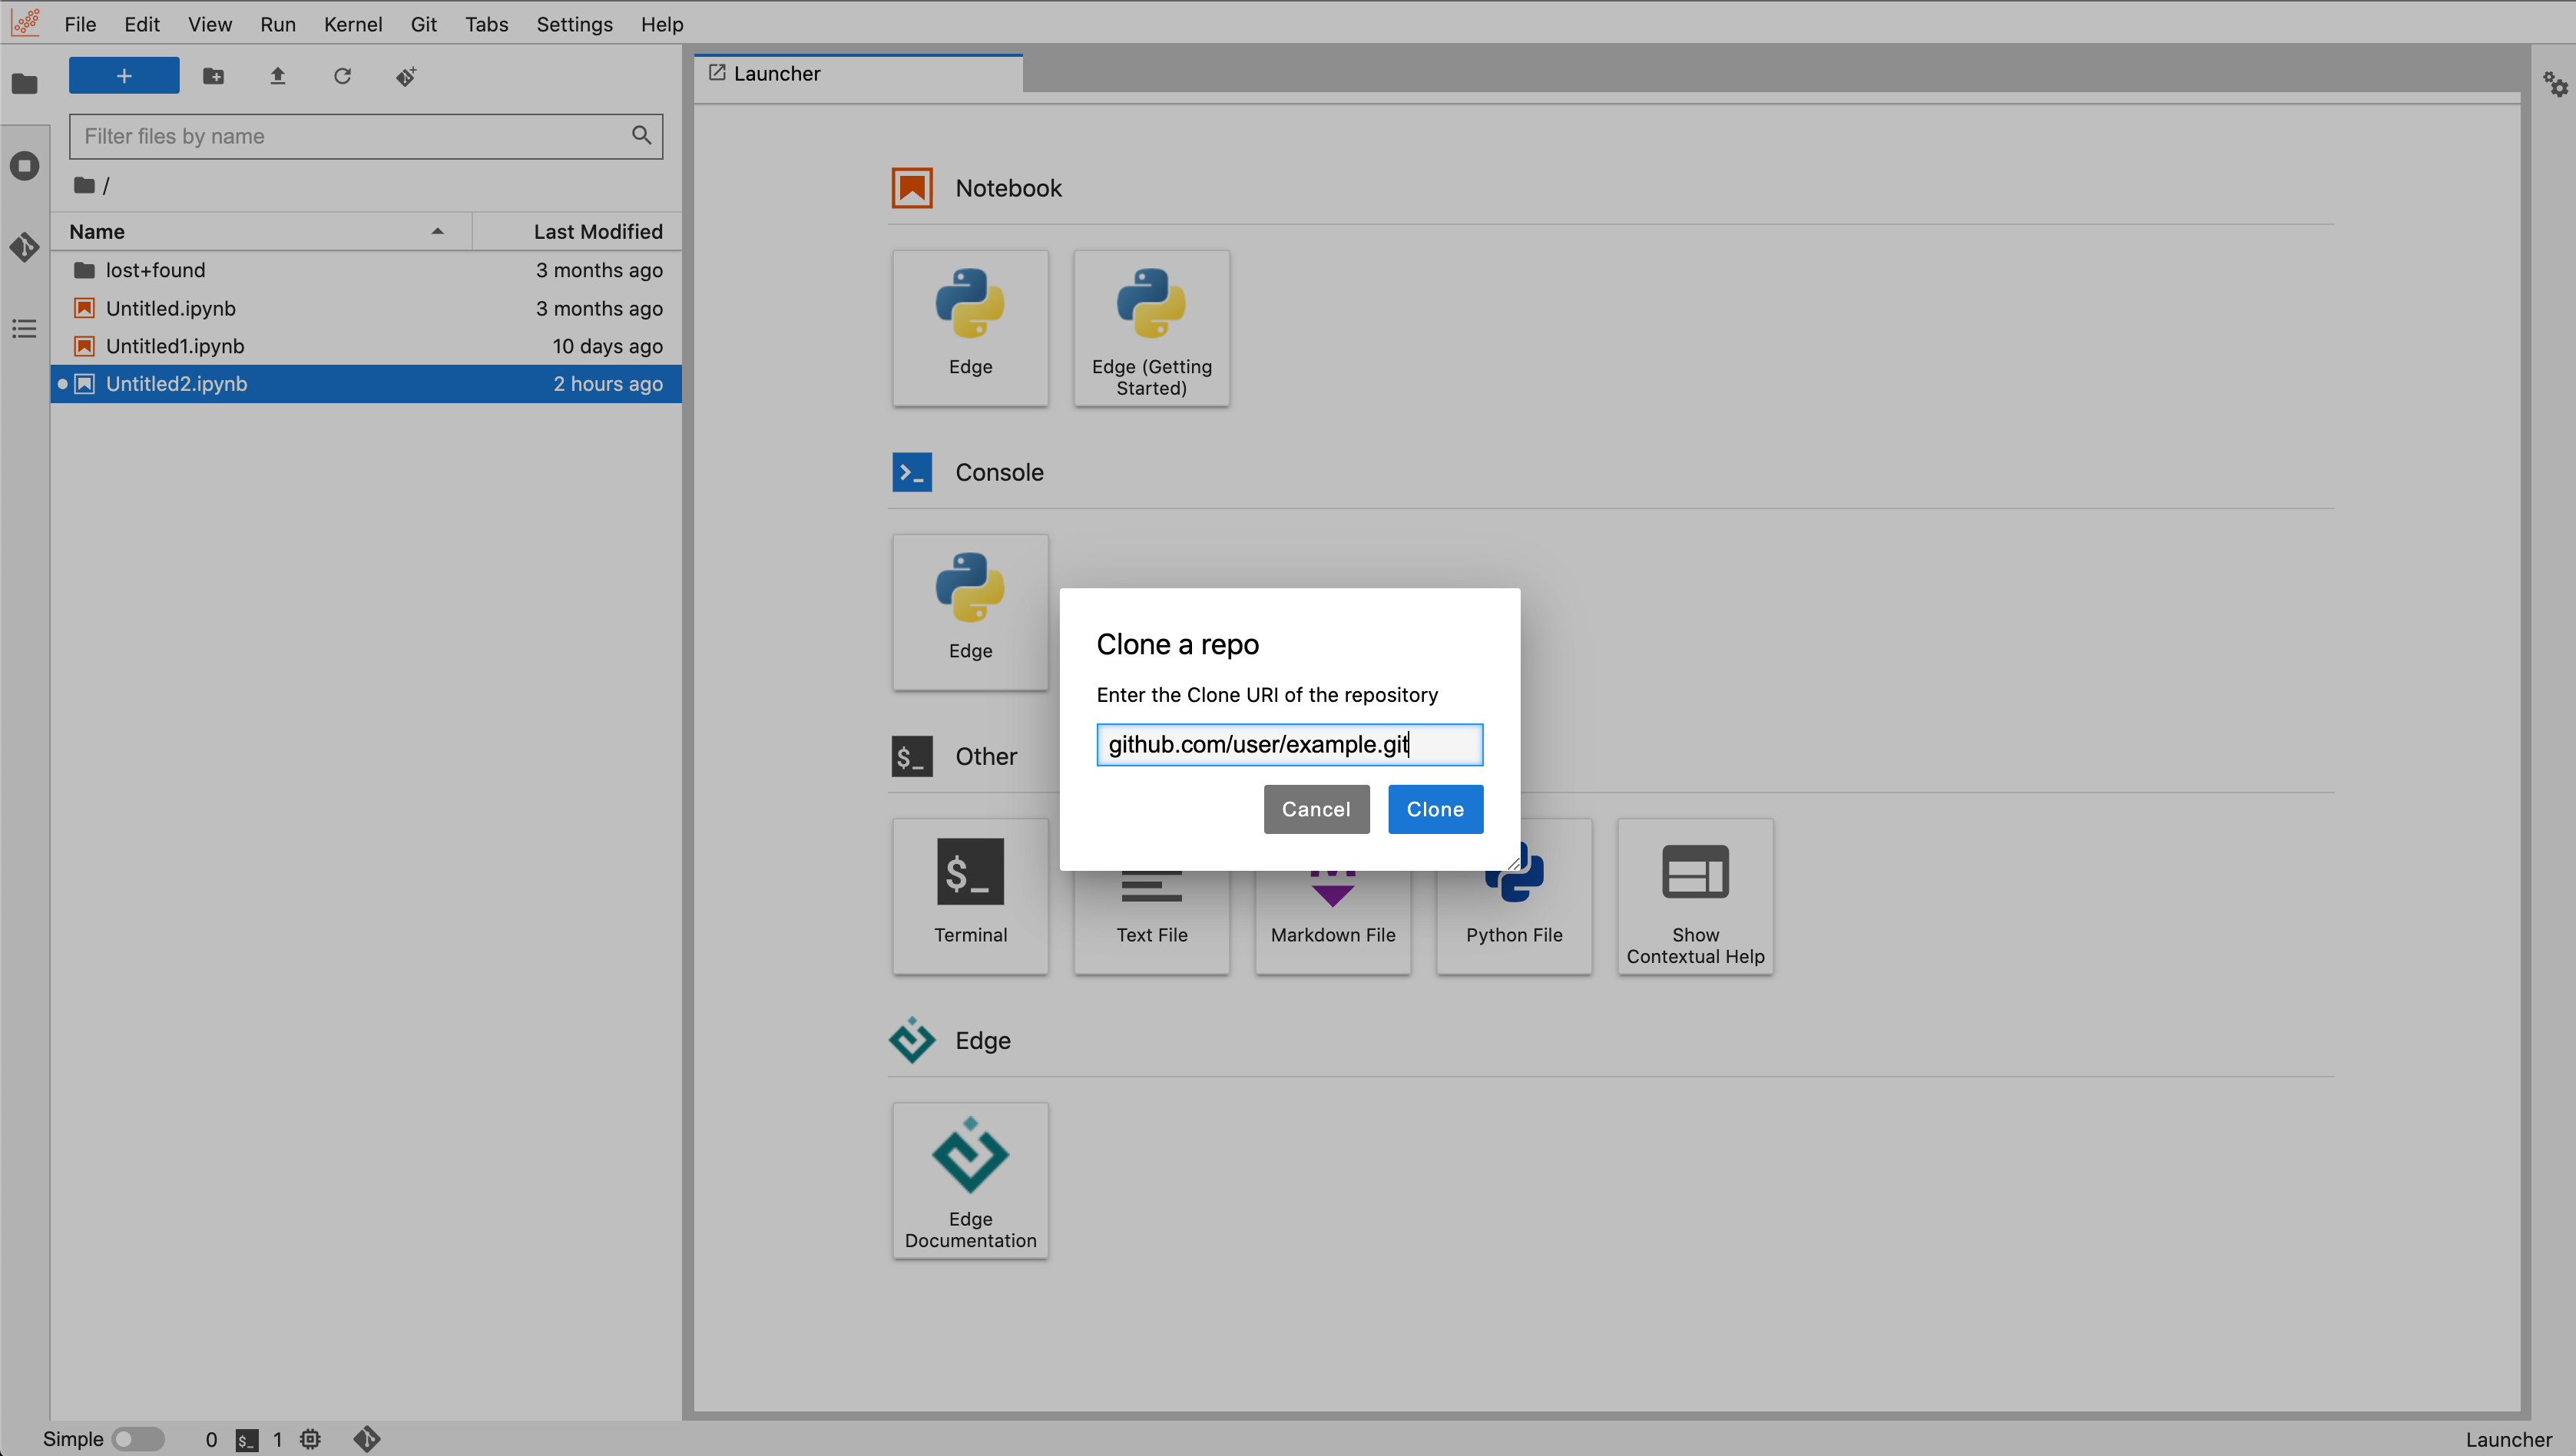
On GitHub, you can find your repository URI by opening the page for the repository and selecting the blue "< > Code" button. In GitLab, open the repository and look for the blue "Clone" button. You can copy the URI from the box that opens.
If your repository is not publicly accessible, you will see a prompt asking for your credentials to the version control service. For security, it is recommended that you enter a personal access token instead of your password. You can find information on creating a personal access token on the GitHub or GitLab documentation pages.
Resetting Edge
If you get into trouble, shut down any running notebooks and run the
reset-edge command from the terminal. This will restore your package set to
the "factory default" settings:
$ reset-edge

Resetting Edge will:

* remove all custom Python packages and environments
* restore your Python packages to factory default

You will NOT lose any files or notebooks.

Continue and reset Edge (y/n)?
When you see the prompt above, enter y to confirm the reset. Your
packages will be restored to their default settings.
We recently upgraded Edge to Python 3.11, moving from version 3.8. Currently,
the Analysis app kernel still uses Python 3.8. To update to Python 3.11, you can
run the reset-edge command from the terminal as described above. This will
successfully update your environment and ensure your JupyterLab kernel is
running Python 3.11.
Upgrading Edge
Run this command to update the enthought_edge package to the latest version.
$ upgrade-edge

Upgrading Edge will:

* preserve all custom Python packages and environments
* upgrade the enthought_edge package in your default EDM environment

You will NOT lose any files or notebooks.

Continue and upgrade Edge (y/n)?
When you see the prompt above, enter y to confirm the upgrade. The
enthought_edge package will upgrade to the latest version.
Automatic Shutdown
To preserve compute resources, any running kernel or terminal that is inactive for 30 minutes will be terminated. After that, if the Analysis App detects no activity for 4 hours, it will automatically shut down.
Avoiding Automatic Shutdown
There are times when you want to extend the life of the Analysis App beyond
the set automatic shutdown time. To this end there is an edge-keepalive
script that allows you to indicate the Analysis environment is busy
even if you are not actively using it:
$ edge-keepalive <duration>
Where duration is an integer followed by a time scale, minutes ('m'), hours
('h'), or days ('d').
$ edge-keepalive 2h

Keeping alive for 2 hours:
Keep alive remaining time:  2:00:00
Keep alive remaining time:  1:59:00
...
Jupyter AI on Edge
Jupyter AI, an extension for Jupyter notebooks, seamlessly integrates generative AI capabilities into the Analysis App. This enhancement facilitates increased productivity and provides the ability to interact with large language models (LLMs) directly within the Jupyter environment. Key offerings of Jupyter AI include:
- Support for a wide range of generative model providers and models.
- A native chat UI in JupyterLab that enables you to work with generative AI as a conversational assistant.
- An
%%aimagic that turns the Jupyter notebook into a reproducible generative AI playground.
Model Providers
Jupyter AI supports a wide range of generative model providers and models. To use Jupyter AI with a specific provider, it is necessary to install the corresponding Python packages and configure the API key within your environment or the chat interface.
For utilizing models from the model providers supported, an authentication token is required; you can set it using:
# NOTE: Replace 'PROVIDER_API_KEY' with the credential key's name,
# and replace 'YOUR_API_KEY_HERE' with the key.
%env PROVIDER_API_KEY=YOUR_API_KEY_HERE
OpenAI is supported by default but other model providers can also be supported upon request.
For more specific instructions for each model provider, refer to the model providers documentation.
The chat interface
Jupyter AI includes a chat interface that puts you in conversation with Jupyternaut, a native chat UI in JupyterLab that presents the idea of interacting with an AI model conversationally. Jupyternaut communicates primarily through text, and it can also interact with files in JupyterLab. It can answer questions as a general-purpose AI assistant, include selections from your notebooks with your questions, insert AI-generated output directly into your notebooks, learn from and ask questions about your local files, and generate notebooks from a prompt. Jupyternaut respects your privacy, only accessing information when you explicitly send chat commands, ensuring that it reads your data only when needed.
To open the chat interface, navigate to the left side panel of your Analysis App, click on the "chat" icon, and then click the "Start Here" button.
This will prompt you to select both a language model and an embedding model. The language model engages with users in the chat panel, generating responses based on prompts. Meanwhile, the embedding model comes into play when learning from and querying local data. Before diving into the chat interface, make sure to provide your API keys for the model providers you selected.
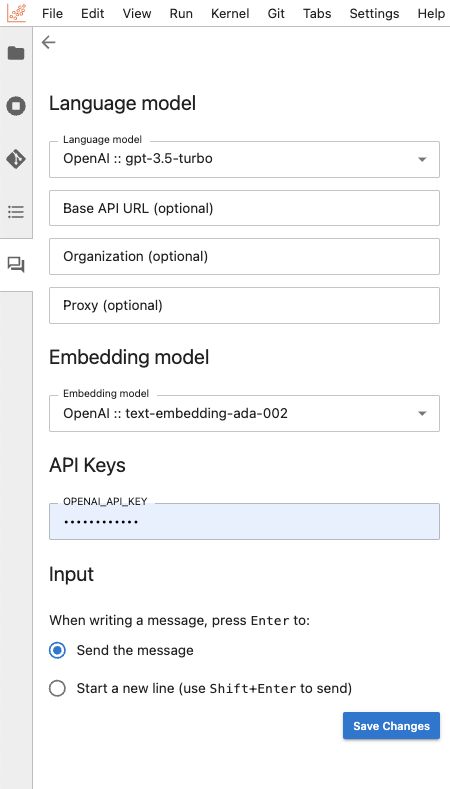
Once you have set all the necessary keys, click the "back" (left arrow) button positioned in the upper-left corner of the Jupyter AI side panel. The chat interface now appears, and you can simply use the message box at the bottom to start engaging.
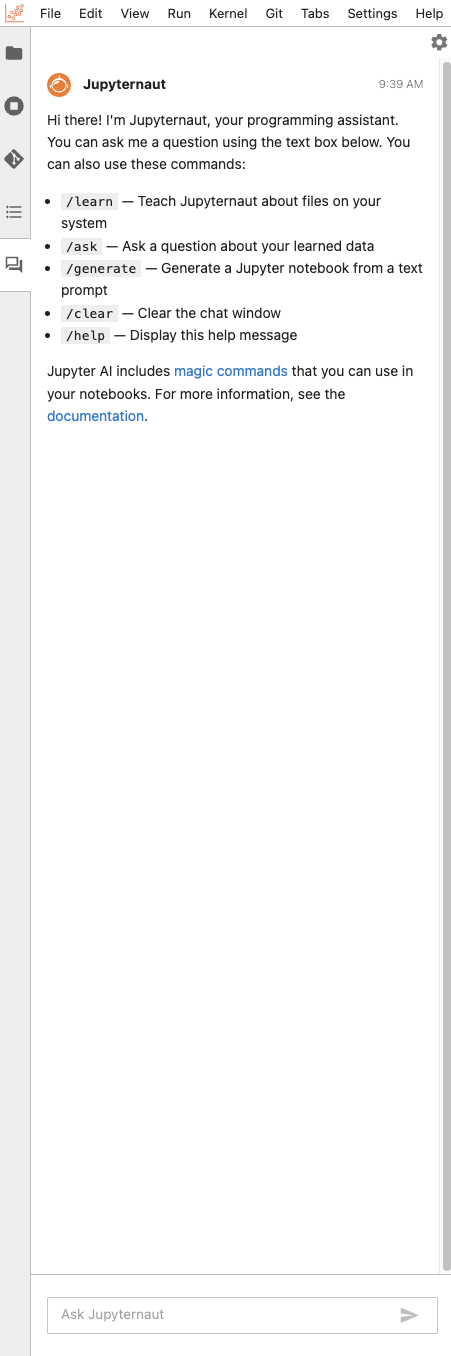
You are able to use the following commands:
/learn: Teach Jupyternaut about files on your system/ask: Ask a question about your learned data/generate: Generate a Jupyter notebook from a text prompt/clear: Clear the chat window/help: Display this help message
For more information on Jupyternaut, refer to the chat interface documentation.
The %ai and %%ai magic commands
Jupyter AI extends its functionality with magic commands that are executable
both in notebook and the command-line interface. You can use Jupyter AI with the
%%ai magic command.
To explore available options and commands, execute %ai help,
which provides insights into both %ai line magic and %%ai cell magic commands.
Before you send your first prompt to an AI model, ensure you load the extension by running the following code in a notebook cell or shell:
%load_ext jupyter_ai_magics
This command won't generate any output. Once the extension is loaded, and the environment variable is configured, you can run %%ai cell magic commands and %ai line magic commands.
The %%ai cell magic allows you to engage with a language model of your choosing
by utilizing a specified prompt. A distinct global model ID distinguishes each
model, formed as a string with the format <provider-id>:<local-model-id>.
Here, <provider-id> signifies the unique identifier of the provider, while
<local-model-id> represents the identifier of the model constrained within
that provider. The prompt is initiated on the second line of the cell.
For example, if you want to send a text prompt to the anthropic provider using
the model ID claude-v1.2, input the following code into a cell and execute it:
%%ai anthropic:claude-v1.2
A function that computes the lowest common multiples of two integers
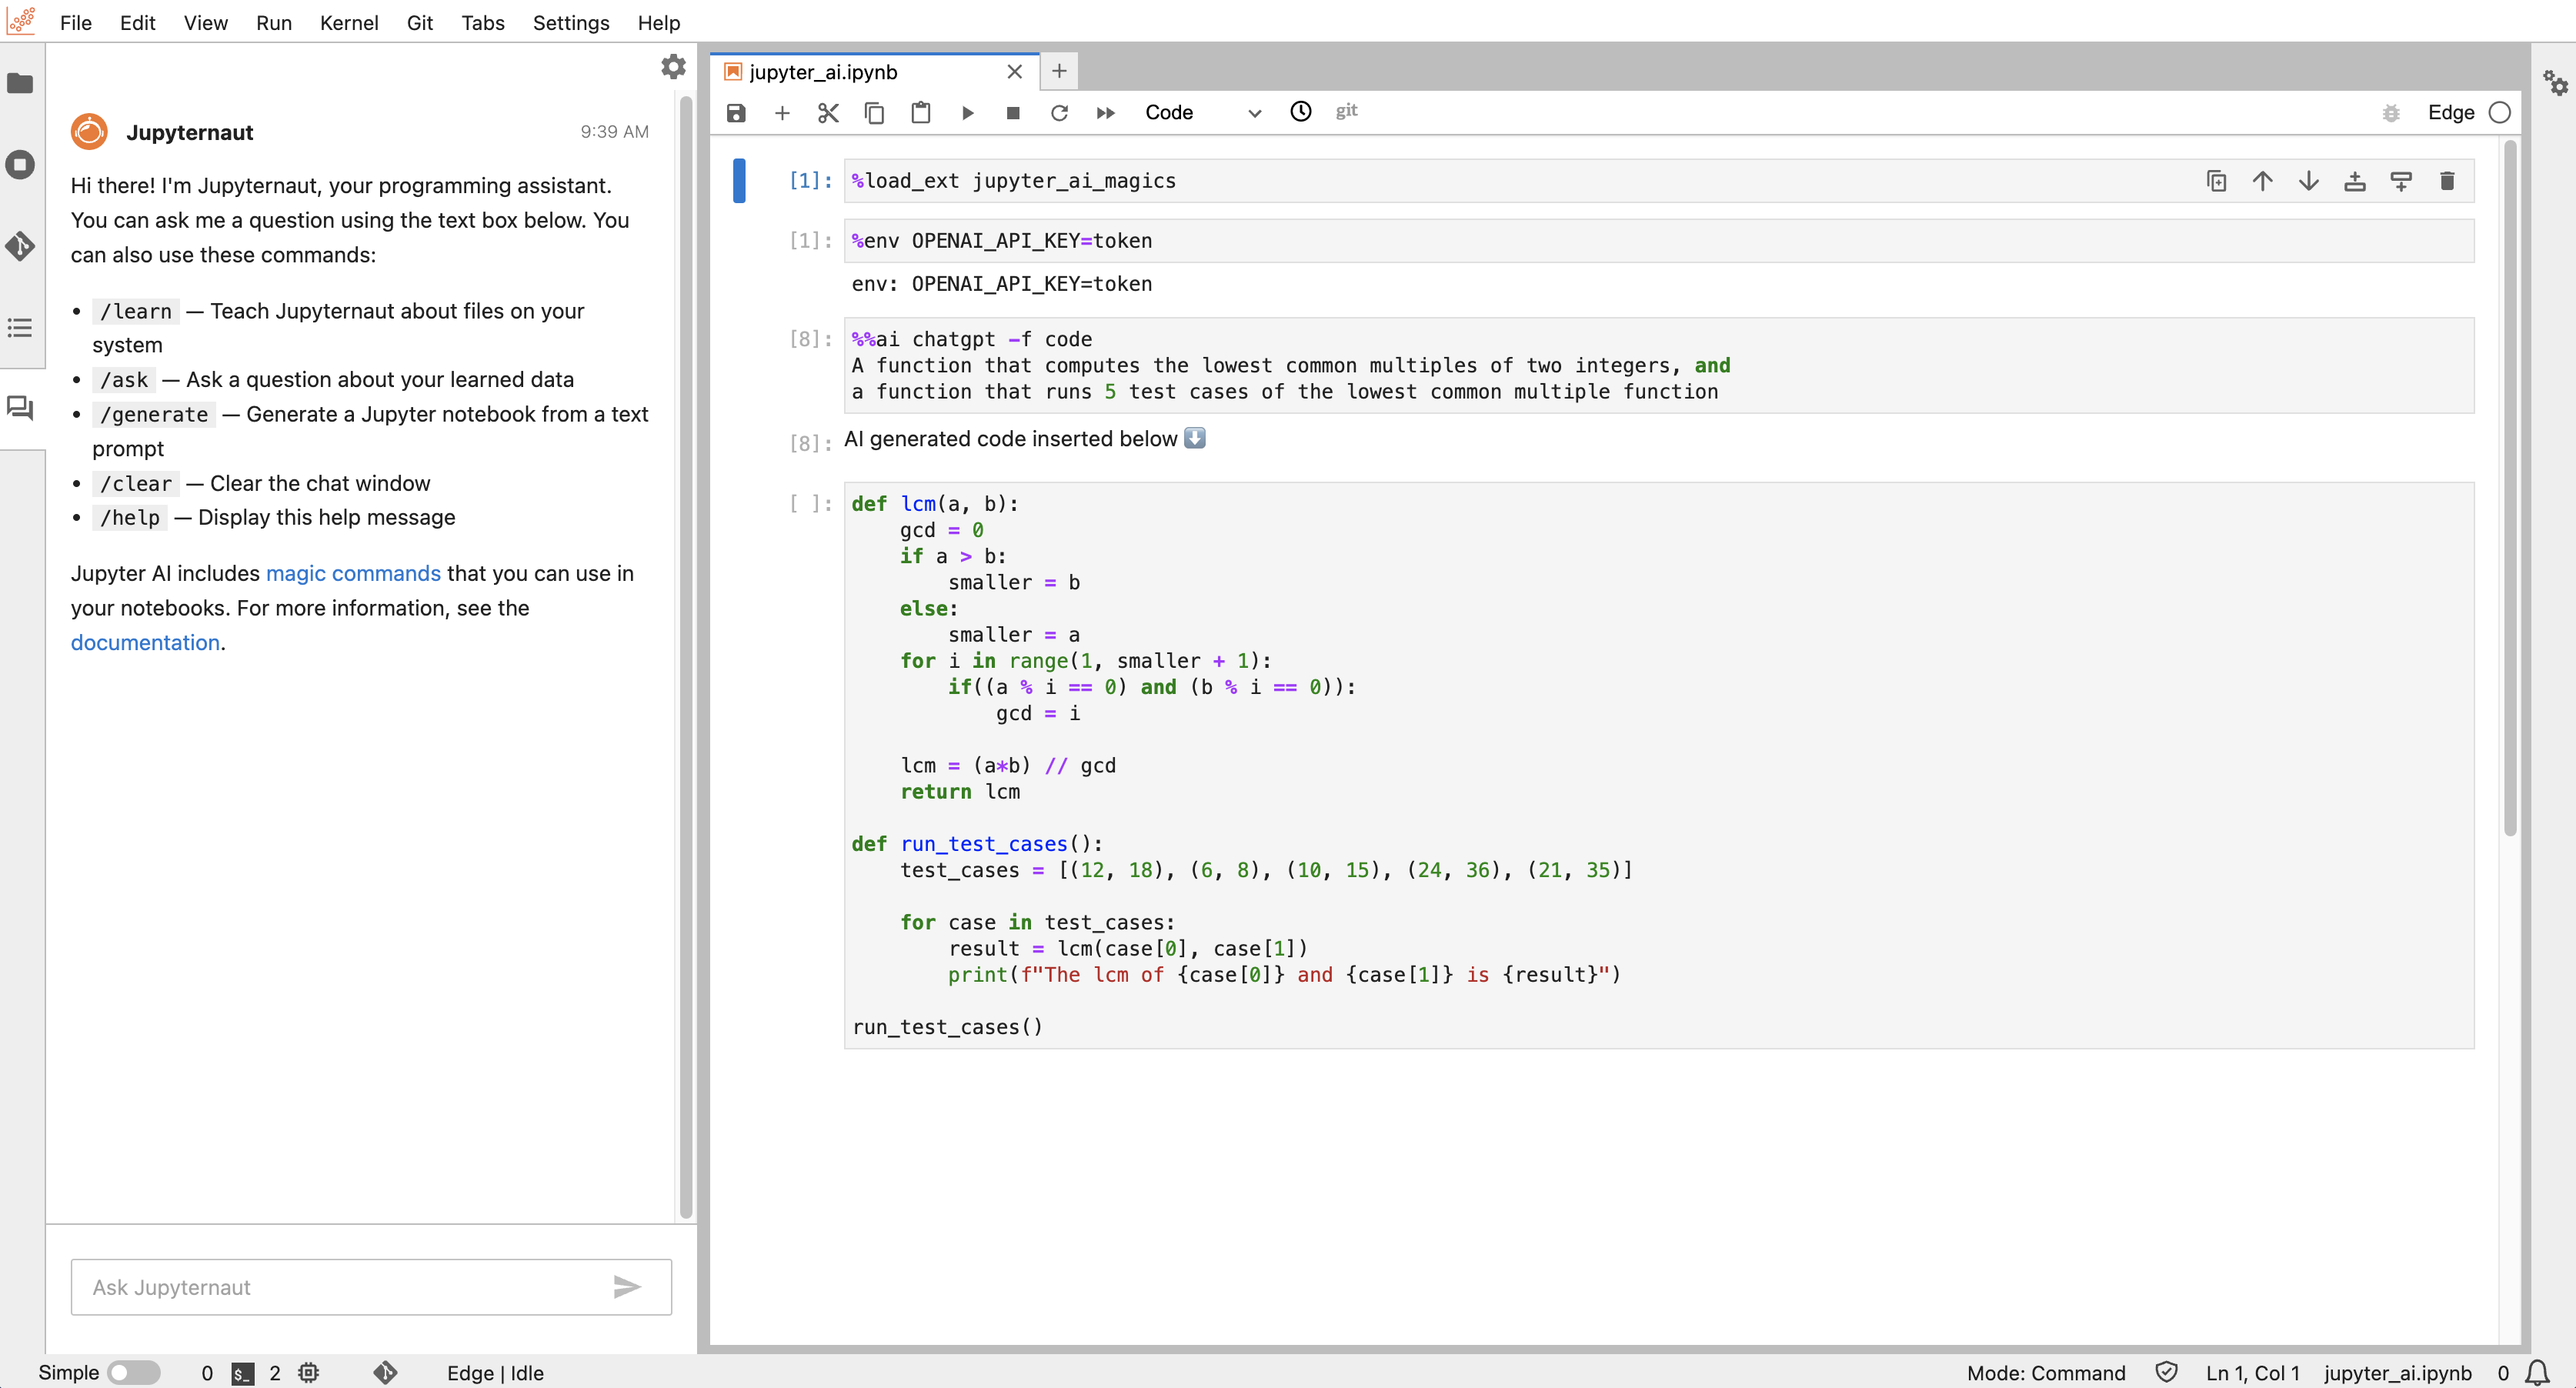
An example using OpenAI's chatgpt can be seen below as well:
For more information on %%ai magic commands, refer to the magic commands documentation.